|
How to backup WordPress Files and Database
Posted by RAJU K, Last modified by RAJU K on 07 March 2013 08:59 PM
|
|
How to backup up WordPress Files and Database:The most important thing in managing wordpress site is backups! It's amazing how many people don't do this. WordPress security landscape is changing and you can never be 100% safe. Making regular backups is the only real way to be sure you can recover from disaster if it ever strikes. Let's see how you can backup your wordpress site. Your WordPress database contains every post, every comment and every link you have on your blog. If your database gets erased or corrupted, you stand to lose everything you have written. There are many reasons why this could happen and not all are things you can control. With a proper backup of your WordPress database and files, you can quickly restore things back to normal. There are two parts to backing up your WordPress site: Database and Files. You need to back up the entire site, and you need to back up your WordPress database. We will start with backing up your WordPress site Files. Copy WordPress Files to Your Desktop:
Your WordPress site consists of the following:
Using FTP Clients you can copy the files to a folder on your computer. Once there, you can zip or compress them into a zip file to save space, allowing you to keep several versions.
WordPress DataBase Backup with phpMyAdmin:
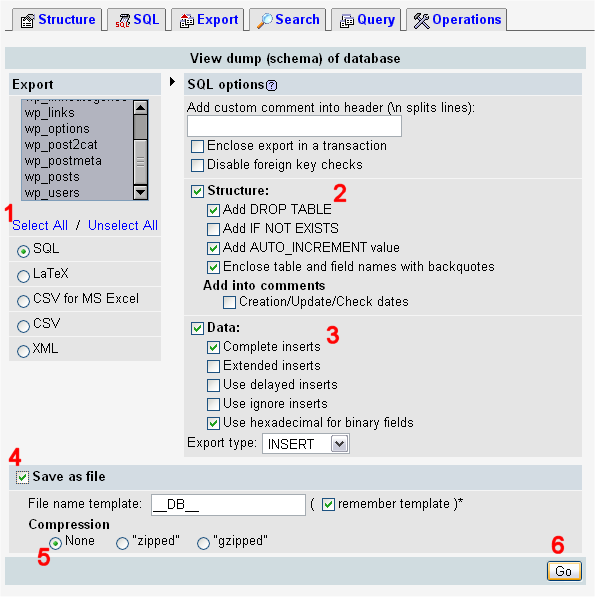
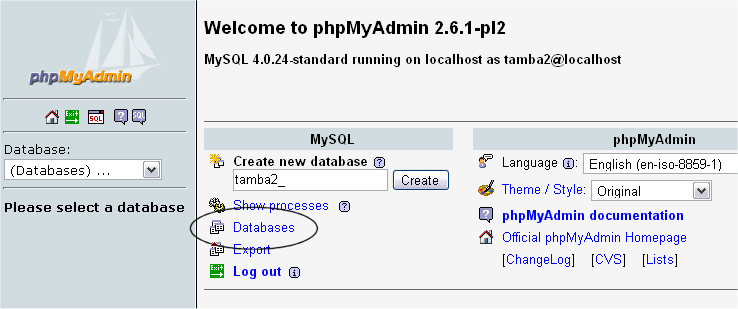
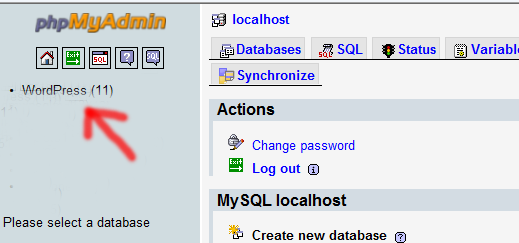
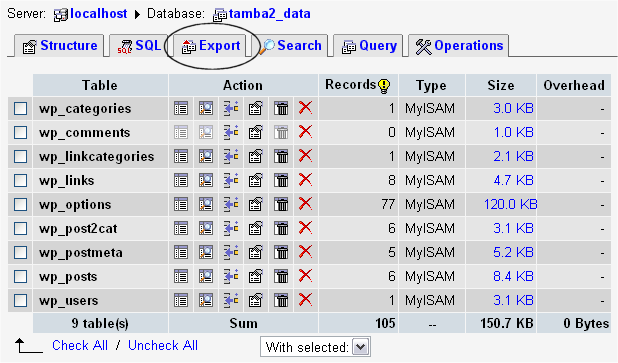
The database contains your posts and a lot of data generated on your site, but it does not include the above elements that all come together to create the look and information on your site. These need to be saved. The following is a very simple version of how to use phpMyAdmin to back up your WordPress database. 1. Begin by clicking database in your phpMyAdmin panel. (It may not be necessary to do this, depending on your version of PHPMyAdmin) 2. You may have several databases. Click the one that holds your WordPress data, the database you created when you installed WordPress (In older versions this may be done through a pull-down menu.) 3. Below is a picture of the default tables in the Structure view tab. You may have more tables -- this would happen if you have any statistics plugins or anti-spam plugins. 4. Click "Export". (The next picture shows the Export tab view.)
5. Keep these files safe, copied and stored in separate places on separate media. 
Restoring Your Database From BackupRestore ProcessUsing phpMyAdmin, follow the steps below to restore a MySQL database.
Now grab a coffee. This bit takes a while. Eventually you will see a success screen. :) If you get an error message while backup or restore, your best bet is to open helpdesk ticket at http://support.fastwebhost.com | |
|
|


